
If you’re running ads using either Facebook or Instagram, then installing the Facebook Pixel is a crucial step to running successful campaigns. The Facebook Pixel not only helps you with conversion tracking, but it also tracks user engagement on your website so the algorithm can optimize the ads you run on Meta platforms. To install the Facebook Pixel on Shopify, there are two ways you can do it. The first way is to use Google Tag Manager (GTM), and the second way is to install the code manually on your site. Each method has its pros and cons that we will discuss.
Finding Your Pixel ID
Before you start installing your Pixel, you need to find it first, which can be difficult if you’re not familiar with Meta’s navigation. If you already have it, you can skip this part.
First, go to the Meta Business Suite,
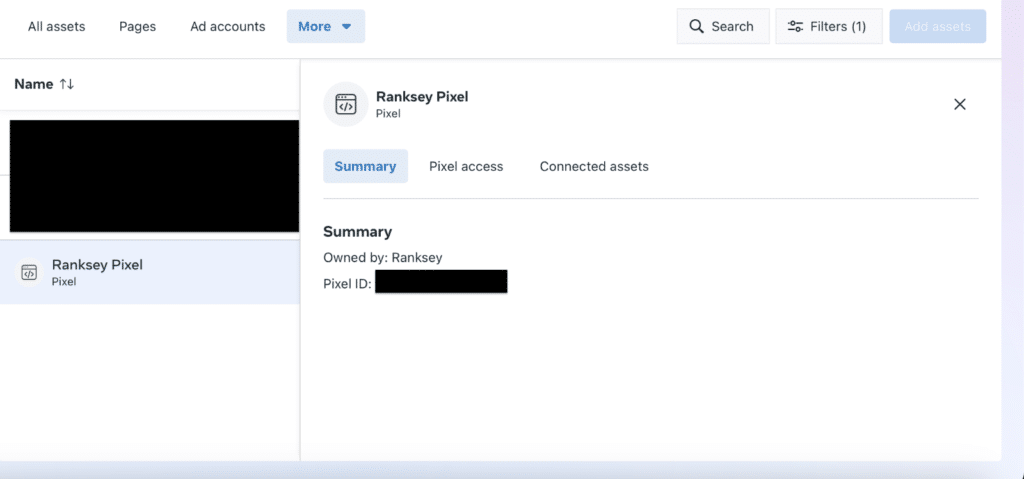
Then, click on Business Assets. Here, you’ll see a list of any accounts you’re associated with. Click on More, and in the dropdown, click on Pixels.
In the list of your accounts that show up, click on the one you want the Pixel ID for, and it will show up.
Install Using GTM
If you already have Google Tag Manager installed, this will be the easier option for you. GTM is what we recommend using since it simplifies the process when you’re setting up multiple tracking tags. If you want to learn how to install GTM, read our Beginner’s Guide to GTM.
Adding the Pixel
If you already have GTM set up and installed on your website, here’s how you install the Facebook Pixel.
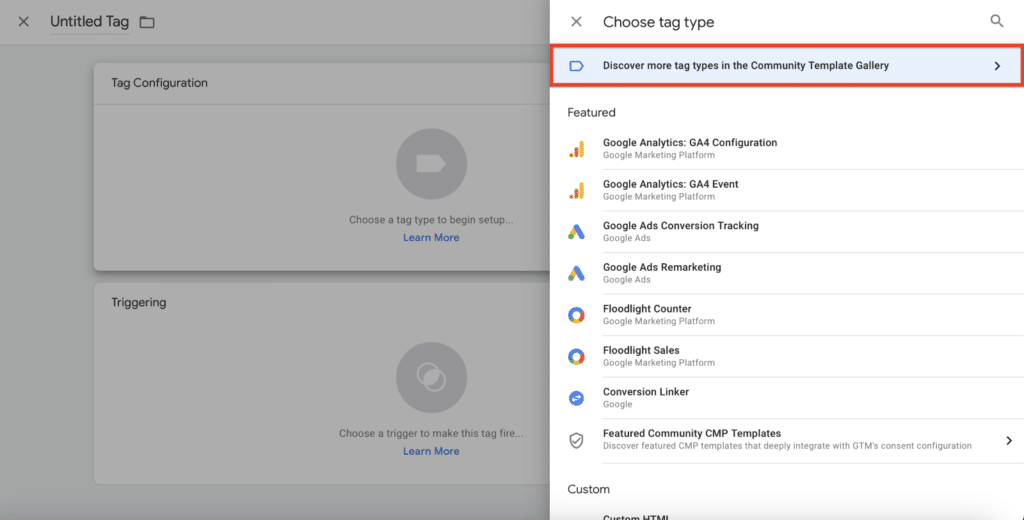
When you go to add a new tag, select the Community Template Gallery
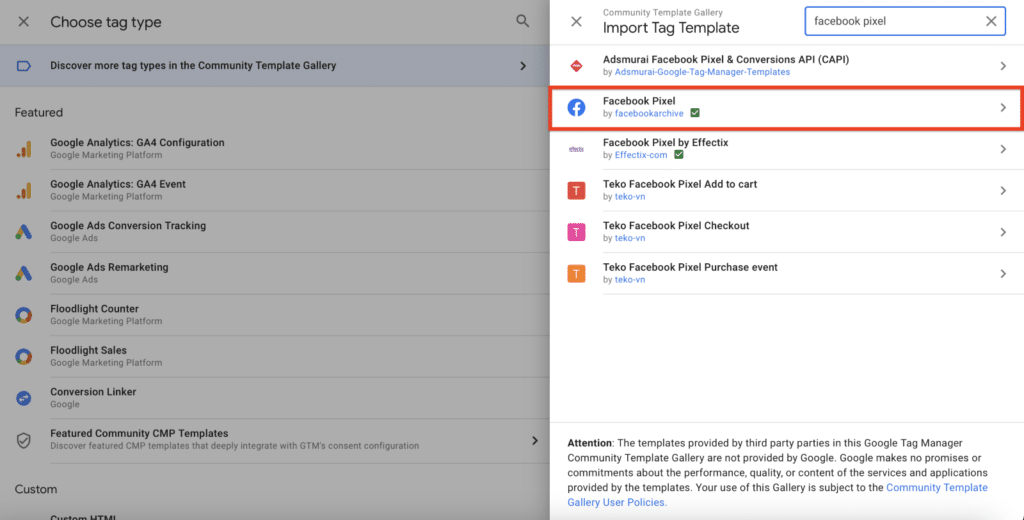
Then, search for “Facebook Pixel” and select the one made by “facebookarchive”
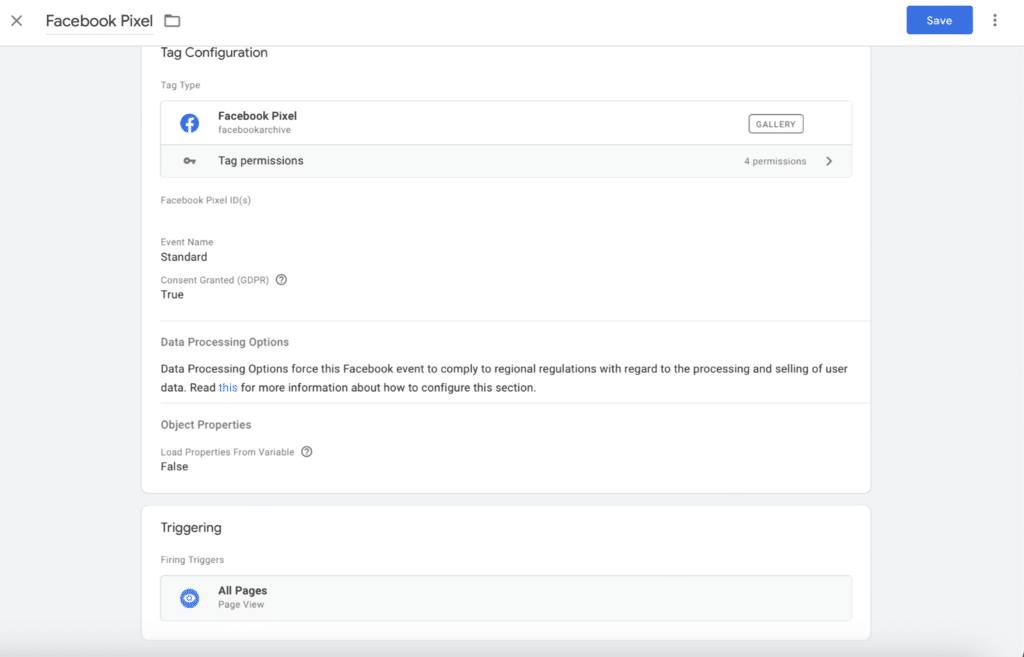
Next, enter your Pixel ID into the correct field, and then add All Pages as the trigger. This means that when someone views your page, the Facebook Pixel will fire, but will not set off a conversion.
Install It Manually
Google Tag Manager does come with a bit of a learning curve, so if you’re new to that concept and would prefer to just directly integrate the Pixel with your Shopify store, that is also an option.
Adding the Pixel
If you want the Meta Pixel on your Shopify store without having to set up Google Tag Manager, you can use Shopify’s Meta integration. From your Shopify dashboard, navigate to Online Store, then Preferences. Once you are in Preferences, scroll down to the Facebook Pixel section, and select “Set up Facebook.
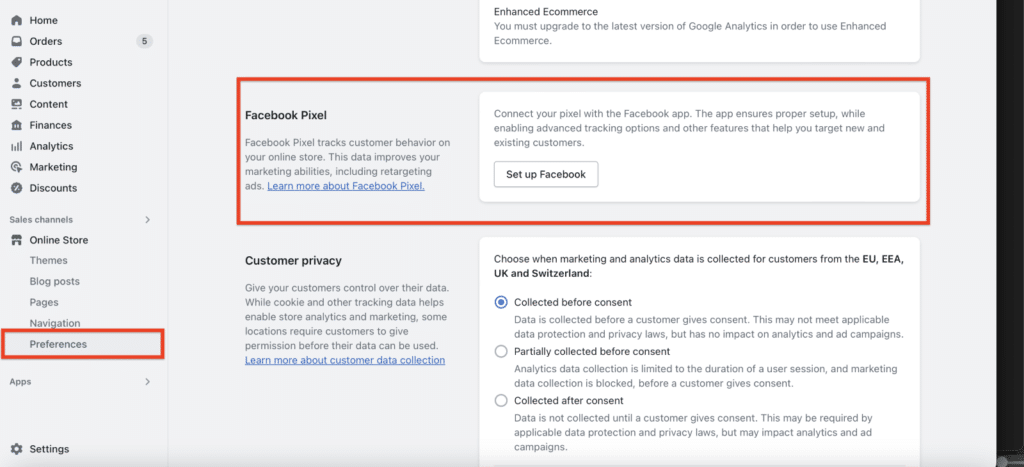
From here, you’ll need to follow the steps it gives you to connect it to Facebook
Looking to Run Meta Ads? Let us Help
The process of setting up the Pixel and conversion tracking can often be complicated, so if you’re not sure what you’re doing, it’s best to hire a professional. If you’re looking to run Facebook Ads or other paid advertising, there’s a lot that goes into it, even aside from setting up conversion tracking. If you need help with PPC setup and management, you can request a free consultation or check out our E-Commerce PPC Management services.